Saturday, November 26, 2011

Painting a Miata, part 2

The paint prep continues. The entire car has been sanded with 400-grit and some small dings on the passenger side filled. I also filled the hole in the trunk from the spoiler mount, and the two holes in the nose from the emblem. I plan to leave the emblem off.
Next weekend I'm going to give it another going-over just to make sure the surface is fully scuffed and everything is smooth, and then I'll be ready to spray the urethane primer. I figure a whole day to mask it and spray the first coat of primer. I'll be doing the door sills as well.
This dent was very wavy and very hard to fill in. It had low spots as well as high spots. It will probably be visible once the paint is on but I don't think anyone will notice it unless I point it out. It feels pretty smooth when you run your hand over it, but it is detectable.

Sunday, November 13, 2011

Painting a Miata, part 1

I started sanding the body today. I'm using sanding pads with 400 grit dry sandpaper. Once I hit the paint with sandpaper I passed the point of no return. I have to paint this car now!
I do plan to remove the door handles, by the way.
This panel has two real nice little dents in it. They happened years ago and I've neglected to do anything about it. I'm very happy to get these fixed. Here they are after I sanded them down to bare metal so the body filler will stick.
I got this stuff from Eastwood. It comes with a tube of hardener. You mix the hardener in at a 2% proportion. After that you have about 3 minutes to get it in place. Forget about making it pretty and smooth. Just get it on there and 15 minutes later you can sand it down smooth.
It took 3 applications to build the material up high enough that I could sand it down level. Interesting how each dent had high spots surrounding it. It's level now as I can't feel any deviation at all when I run my hand over the filler. The primer-filler and paint coats should make it disappear completely.
This was as far as I got today. I did the driver door, left rear quarter, and the trunk lid. Next weekend I'll continue around the rest of the car, then probably go over it again completely before I spray primer-filler. I'm wiping down between sanding passes with a product called Pre to keep the dust down and hopefully avoid any contamination that would create fisheyes or pinholes. We shall see if it works.

Final details on the cooling system.

So today I installed the Koyorad radiator in the Miata and got the rest of the coolant hoses installed. I also finalized the routing of the fuel lines and got everything tidied up and zip-tied in place. The engine compartment is really looking proper now.
Old vs. New. While the old coolant pipe would probably work, leaving it in place would bug me because it's pretty corroded after 18 years of service. Replacing it with new resets the clock which is one of my main goals in this project.
Stant 10227 radiator cap fits the Koyorad (or any other Miata radiator).
So this is it for the mechanical stuff for a while. The next few posts will be about the paint and body work. We'll get back to the engine when I'm ready to start it.

Thursday, November 10, 2011

Koyorad 37mm Aluminum Radiator

Got this in from Good-Win Racing today. Nicely packaged to arrive safely.
Beautifully made, very light, and should perform well. The Miata cooling fans will bolt right up. I'll install it this weekend and get the cooling system buttoned up.

Monday, November 07, 2011

Engine install details

I found the issue with my transmission not wanting to mate to the engine. It was my fault. Using the transmission jack, I got the transmission perfectly lined up with the engine block, threaded all the bellhousing bolts in by hand and proceeded to tighten them down thinking that would just pull things together easily. It would have worked if the splines on the clutch disk and the transmission input shaft happened to be lined up or at least pretty close to lined up. Unfortunately, they were exactly NOT lined up and the slow compression by the bolts drawing things together just crushed the splines and made it impossible for them to engage the input shaft. I can probably clean up the splines with a file and salvage this clutch disk but I didn't have time to do that now. I threw the old clutch disk in since it showed very little wear anyway. It's got a good 80-100k miles in it still.


A quick clean up of the starter. Wire brushed it and hit it with some chassis black. I replaced the mounting bolts with new ones.
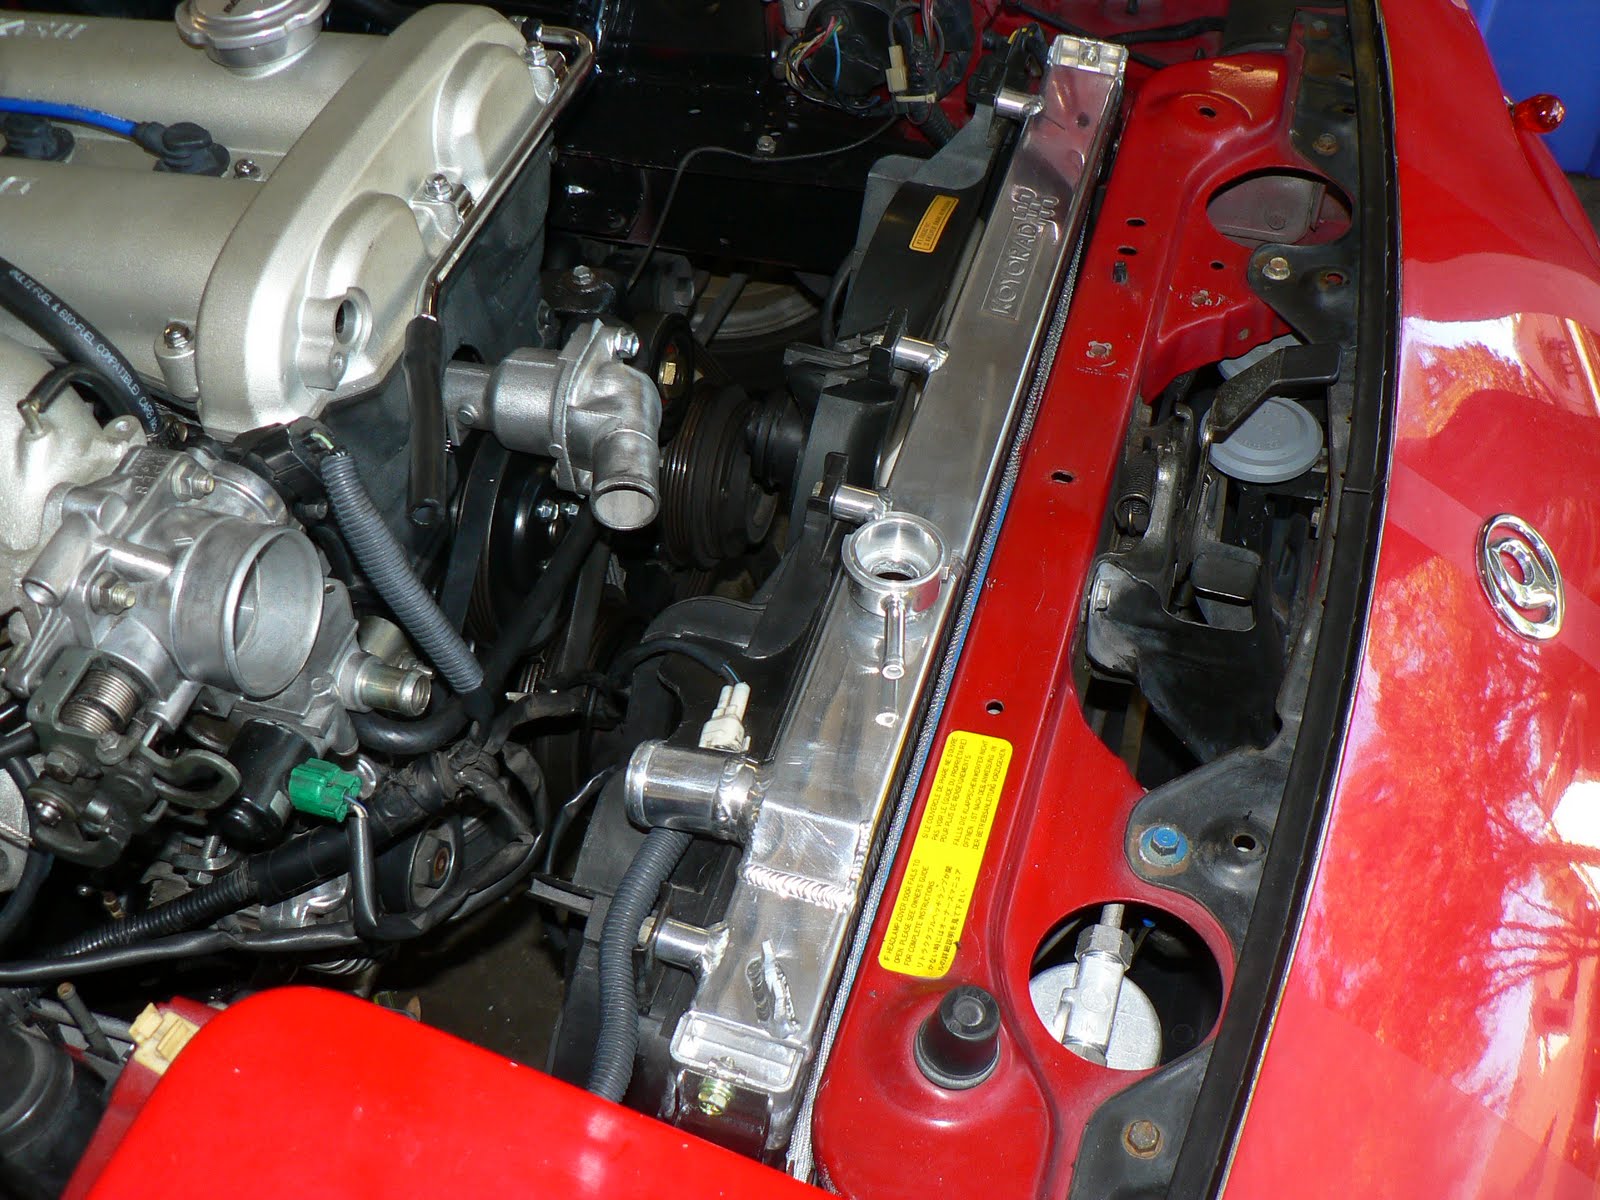
The Power Plant Frame was nasty dirty from the oil leak so I pulled it out and cleaned it up. Having it out made maneuvering the transmission back into place a bit easier, too.
I had sort of underestimated the amount of work involved in getting the engine fully dressed and everything hooked back up. I spent a whole day and a half doing just that. I installed the starter, A/C compressor, PCV hoses, belts, brake booster lines, clutch slave, Power Plant Frame, exhaust header, O2 sensor, and fuel pressure reference sensor. I still have to install the radiator (ordered a new all-aluminum KOYO 37mm radiator) and associated hoses, plus the heater hoses but I'll do that when the radiator gets here.
Using the '99 head and intake manifold leaves nowhere to mount the PRC solenoid valve, so I relocated it to where the carbon canister was. It has to be within reach of the wiring harness and it has two vacuum connections so it has to be in this general neighborhood. Hopefully it won't matter that it's vertical instead of horizontal. This valve helps the engine start under hot-restart conditions and doesn't do anything most of the time.
Finally, I filled the transmission with Amsoil MTG 75W-90 gear oil. It's very easy with a proper pump.