 Here you can also see the shiny, brand-new factory Mazda tail lights I bought from Priority Mazda.

 Here you can also see the shiny, brand-new factory Mazda tail lights I bought from Priority Mazda.
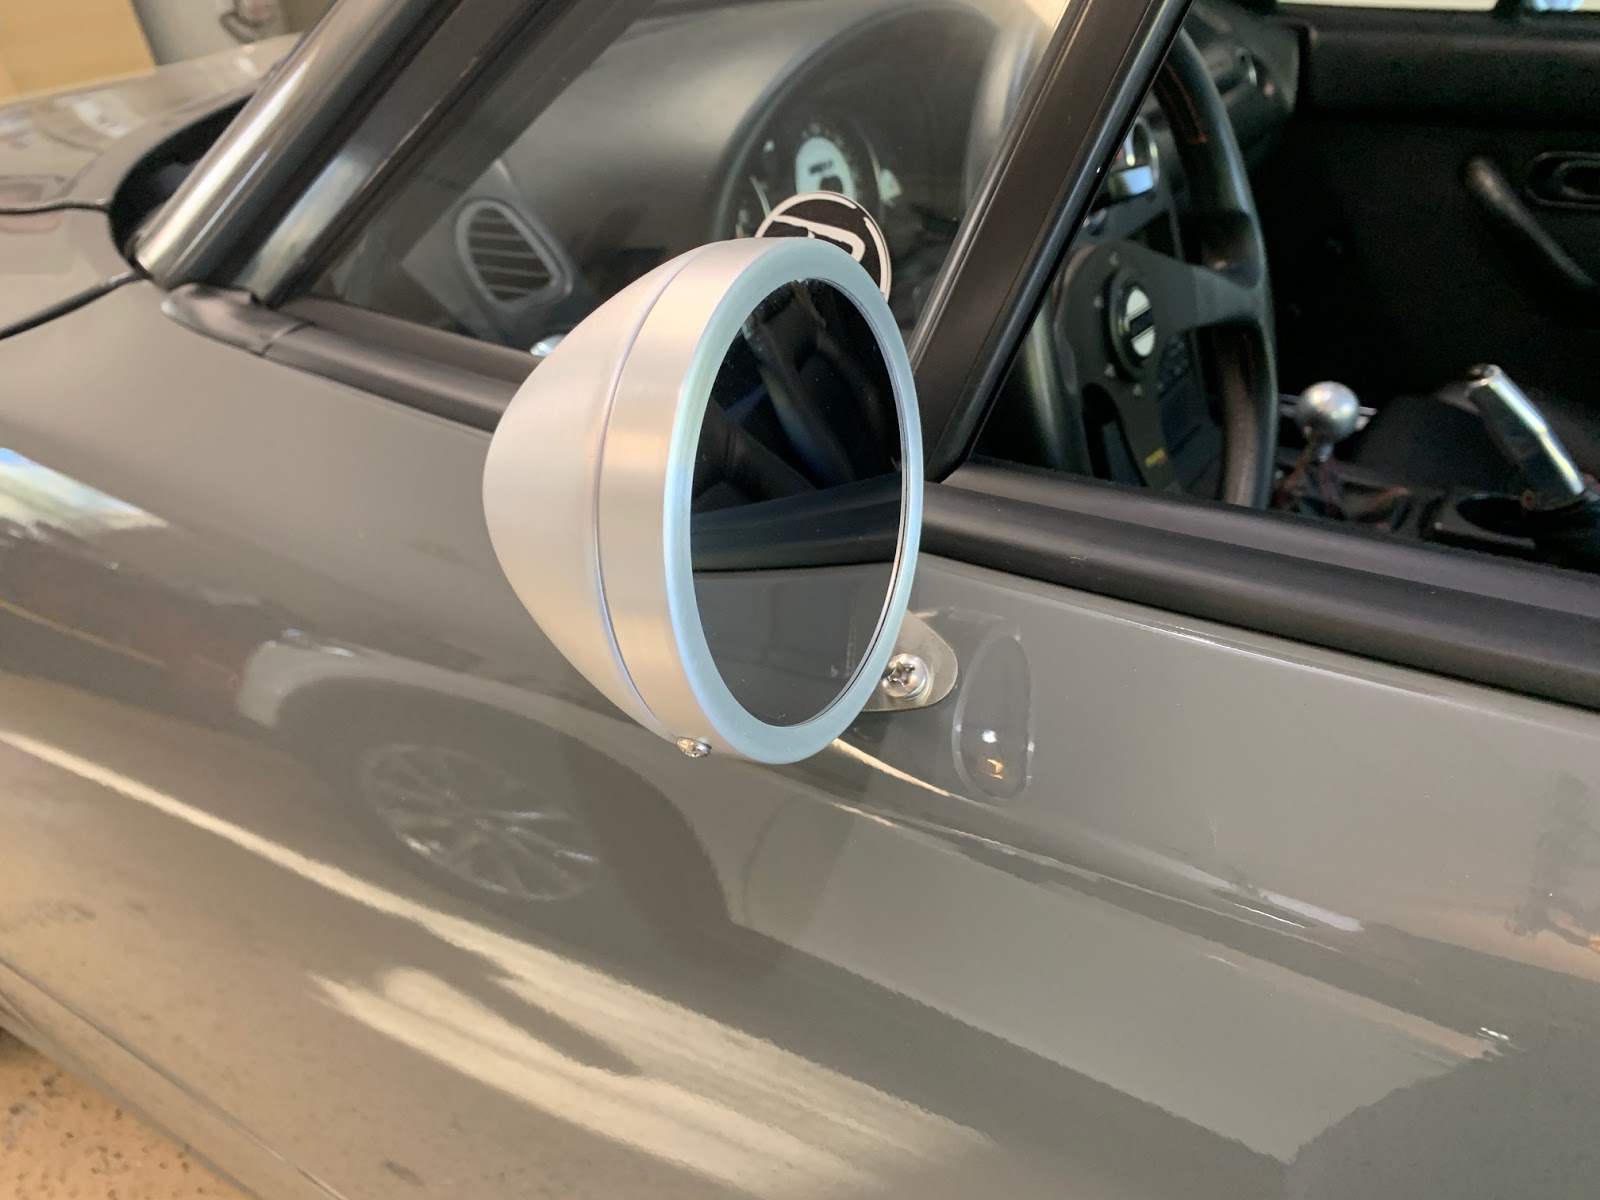
Even though I had the original mirrors painted with the rest of the car, and they came out looking great, I still wanted to try something different. I got a set of Raydot racing-style mirrors from Moss Motors and the result is quite nice! They look great and have a bigger impact on the look of the car than I expected. The pictures here really don't do them justice. Installation was very straightforward but takes a little trial and error to get the tension on the mount right. Too loose and the mirrors will flop around - too tight and you can't adjust it. You get two identical mirrors which means BOTH are convex, so that takes a little getting used to. But the convexity makes up for the smaller size of the mirror, so it's worth it. They're also a few ounces lighter than the factory mirrors, if that floats your boat.


In addition to the new carpet I showed in the previous post, I did a couple other little dress-up projects in the Miata's interior.
 First, I sent off to Revlimiter for a nifty new horn button and some new door sill emblems. All of these are in the vintage Mazda script that is also found on the gauge faces I installed 3 years ago, also from Revlimiter.
 The horn button didn't work with the center trim ring that this Momo Tuner wheel normally has, but works just fine if you just omit the trim ring, which I did. I'm fine with the wheel without it.
 The door sill emblems replace the original stickers with these made from urethane epoxy. Instead of flat stickers they're a bit domed and have a little "give" to them. These door sills came via eBay a number of years ago, and were pretty well broken in then. I've polished them up a bit but they still show quite a few scratches. I chalk it up to patina and live with it.
 So the interior looks pretty nice. Nothing fancy but stock-ish and clean with different elements purchased decades apart. The vent rings are the original "MRoad" rings I must have bought in about 1998. The shift knob and brake handle are Voodoo items from about that same year. The seats I did in 2017, the steering wheel in 2012, and the gauge faces in 2018. The radio is the original from 1994. The door panels I re-did in new vinyl in 2006 or so.
One of the bigger projects for this makeover was to install new carpet. The 28 year old original carpet was just in really bad shape, and the insulation underneath it had gotten wet one too many times.
 I started out, obviously, by pulling out all the old carpet. It had been wet a few times in the last couple years while this car sat in my driveway waiting for me to get serious about it. There were a few very small spots of surface rust starting, mostly on factory spot welds, so I hit them with a sanding disk and then coated most of the floor area on the driver side with POR-15.
 The carpet kit I bought is the basic one from Moss Motors. It comes with insulation (shown) and it's a loop carpet very similar to the original 1994 carpet. That said, this is not a molded carpet kit, meaning the carpet pieces are not formed to conform to the curves and angles of the chassis floor. Instead, it comes in several pieces. There are separate pieces that fit along the transmission tunnel and door sill, and then a piece for the floor that overlaps the side pieces.
  As I was installing this carpet I was starting to think I'd made the wrong decision. This kit is significantly cheaper than the fully molded kit, but I wasn't convinced that this was going to turn out looking decent. There are some holes pre-made in sort-of the right places, but there are still some holes you have to make yourself, and some minor trimming here and there.
 In the end, though, I feel like it turned out pretty well. You can certainly see the different pieces where the sections overlap, but it doesn't really look bad.
 I don't have a soft-top at the moment so the rear shelf came out looking quite clean! This actually works better than the factory carpet did here.
 I'm going to get floor mats anyway, so this is fine and doesn't matter.
 On this piece, though, I didn't think the kit was good. I actually re-used the factory piece behind the seats. As you can see the factory piece (top) was in decent shape anyway, but the kit piece is completely the wrong size. I just couldn't make it work so happily put the factory piece back in and it's fine.
This is the kit I bought and I do recommend it. A molded kit might be better but it might also be poorly fitting and difficult to install and is a couple hundred dollars more expensive. For this price ($289 at the time of this writing), I can just install new carpet every few years and be happy.