New Addition to the Garage - BMW M2 Competition
Much more on this in due time, but there's been a change at Morrison's Garage this month. Welcome the 2021 BMW M2 Competition! She's a beast!

Hey! Long time no post! Yes, I'm still here - alive and kicking, and the Miata sometimes gets a little attention. Nowadays it's garaged 600 miles away from my main digs and I only get to see it a few months of the year, but when I am with it, the magic is still there. I actually drive it more miles per year than I did for the last five years before I got it painted and fixed it up.
Anyhoo, when I'm at our place in Florida, I get really bored and need things to do, because...well, just because. So last year I decided I would update the technology stack inside the Miata from 1990 tech to 2022 tech. In our other car, we have Apple CarPlay from the factory and we do use it quite a bit for navigation and streaming music and podcasts. So I figured that'd be a nice upgrade for the Miata, even though I never take it on long trips. I still need navigation around town sometimes and well... see above - I was bored. So the pictures here in this blog post show what I did. It's a Pioneer DMH-W2770NEX. It is pretty no-frills, actually. It just has basic stereo receiver, bluetooth, and wireless CarPlay functions (Android Auto, too but I don't use that).
As I am a terrible documentarian, these photos are a bit jumbled and not very well conceived. BUT they do sort of show what I did so let's just go with it. I was able to use the factory stereo bracket to mount this unit. That was just luck. So I didn't need any sort of adapter

As you can see, the NA Miata's stereo mount opening is not really double-din. It's a bit taller so there's a gap under the stereo unit. The following pics show how I dealt with that. For transparency, I didn't dream this up on my own. I found a YouTube video and just copied what they did.
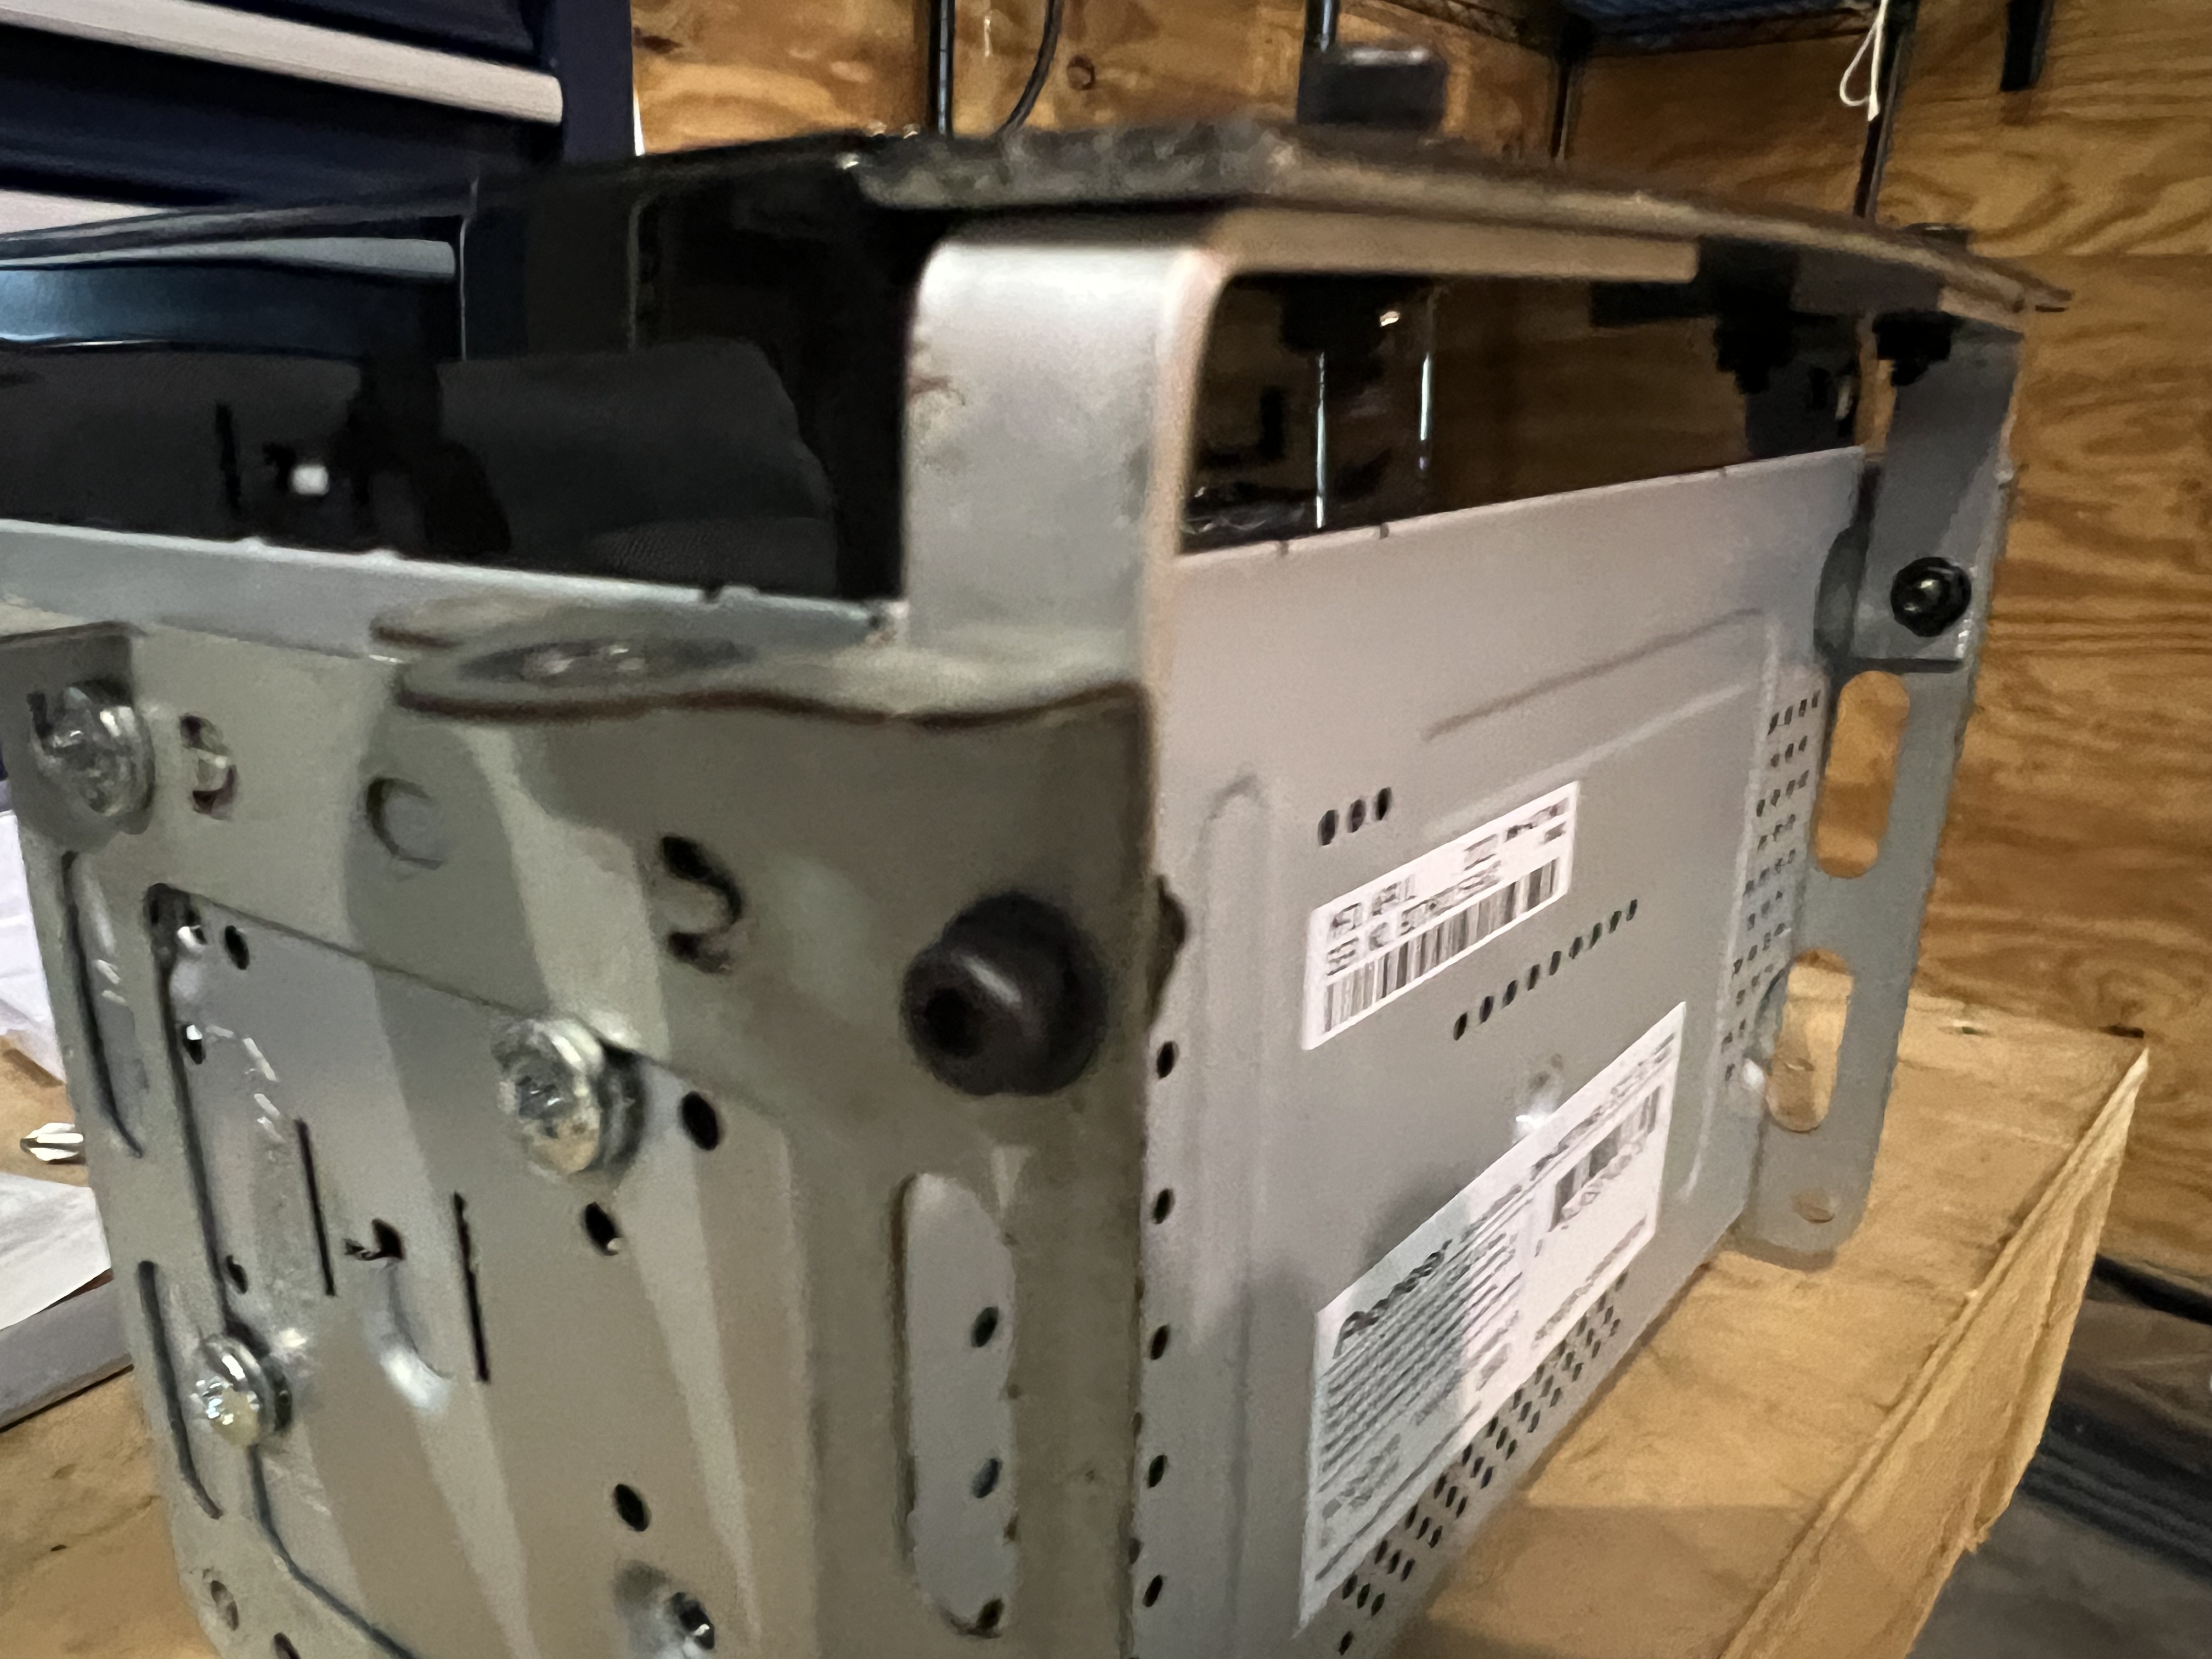
I fashioned some little brackets from aluminum stock to attach to the factory bracket, and a faceplate filler from some bigger stock Plasti-dipped for color. I bought some small cap head screws with washers and bolts to hold it all together and there you go. You can see how the factory bracket isn't really a perfect fit for this stereo, but I was able to get one bolt in a good hole, and two others were a little off but overlapped the bracket just enough to get a hold on it. It's actually quite solid and I'm really glad I didn't have use some stupid adapter kit.

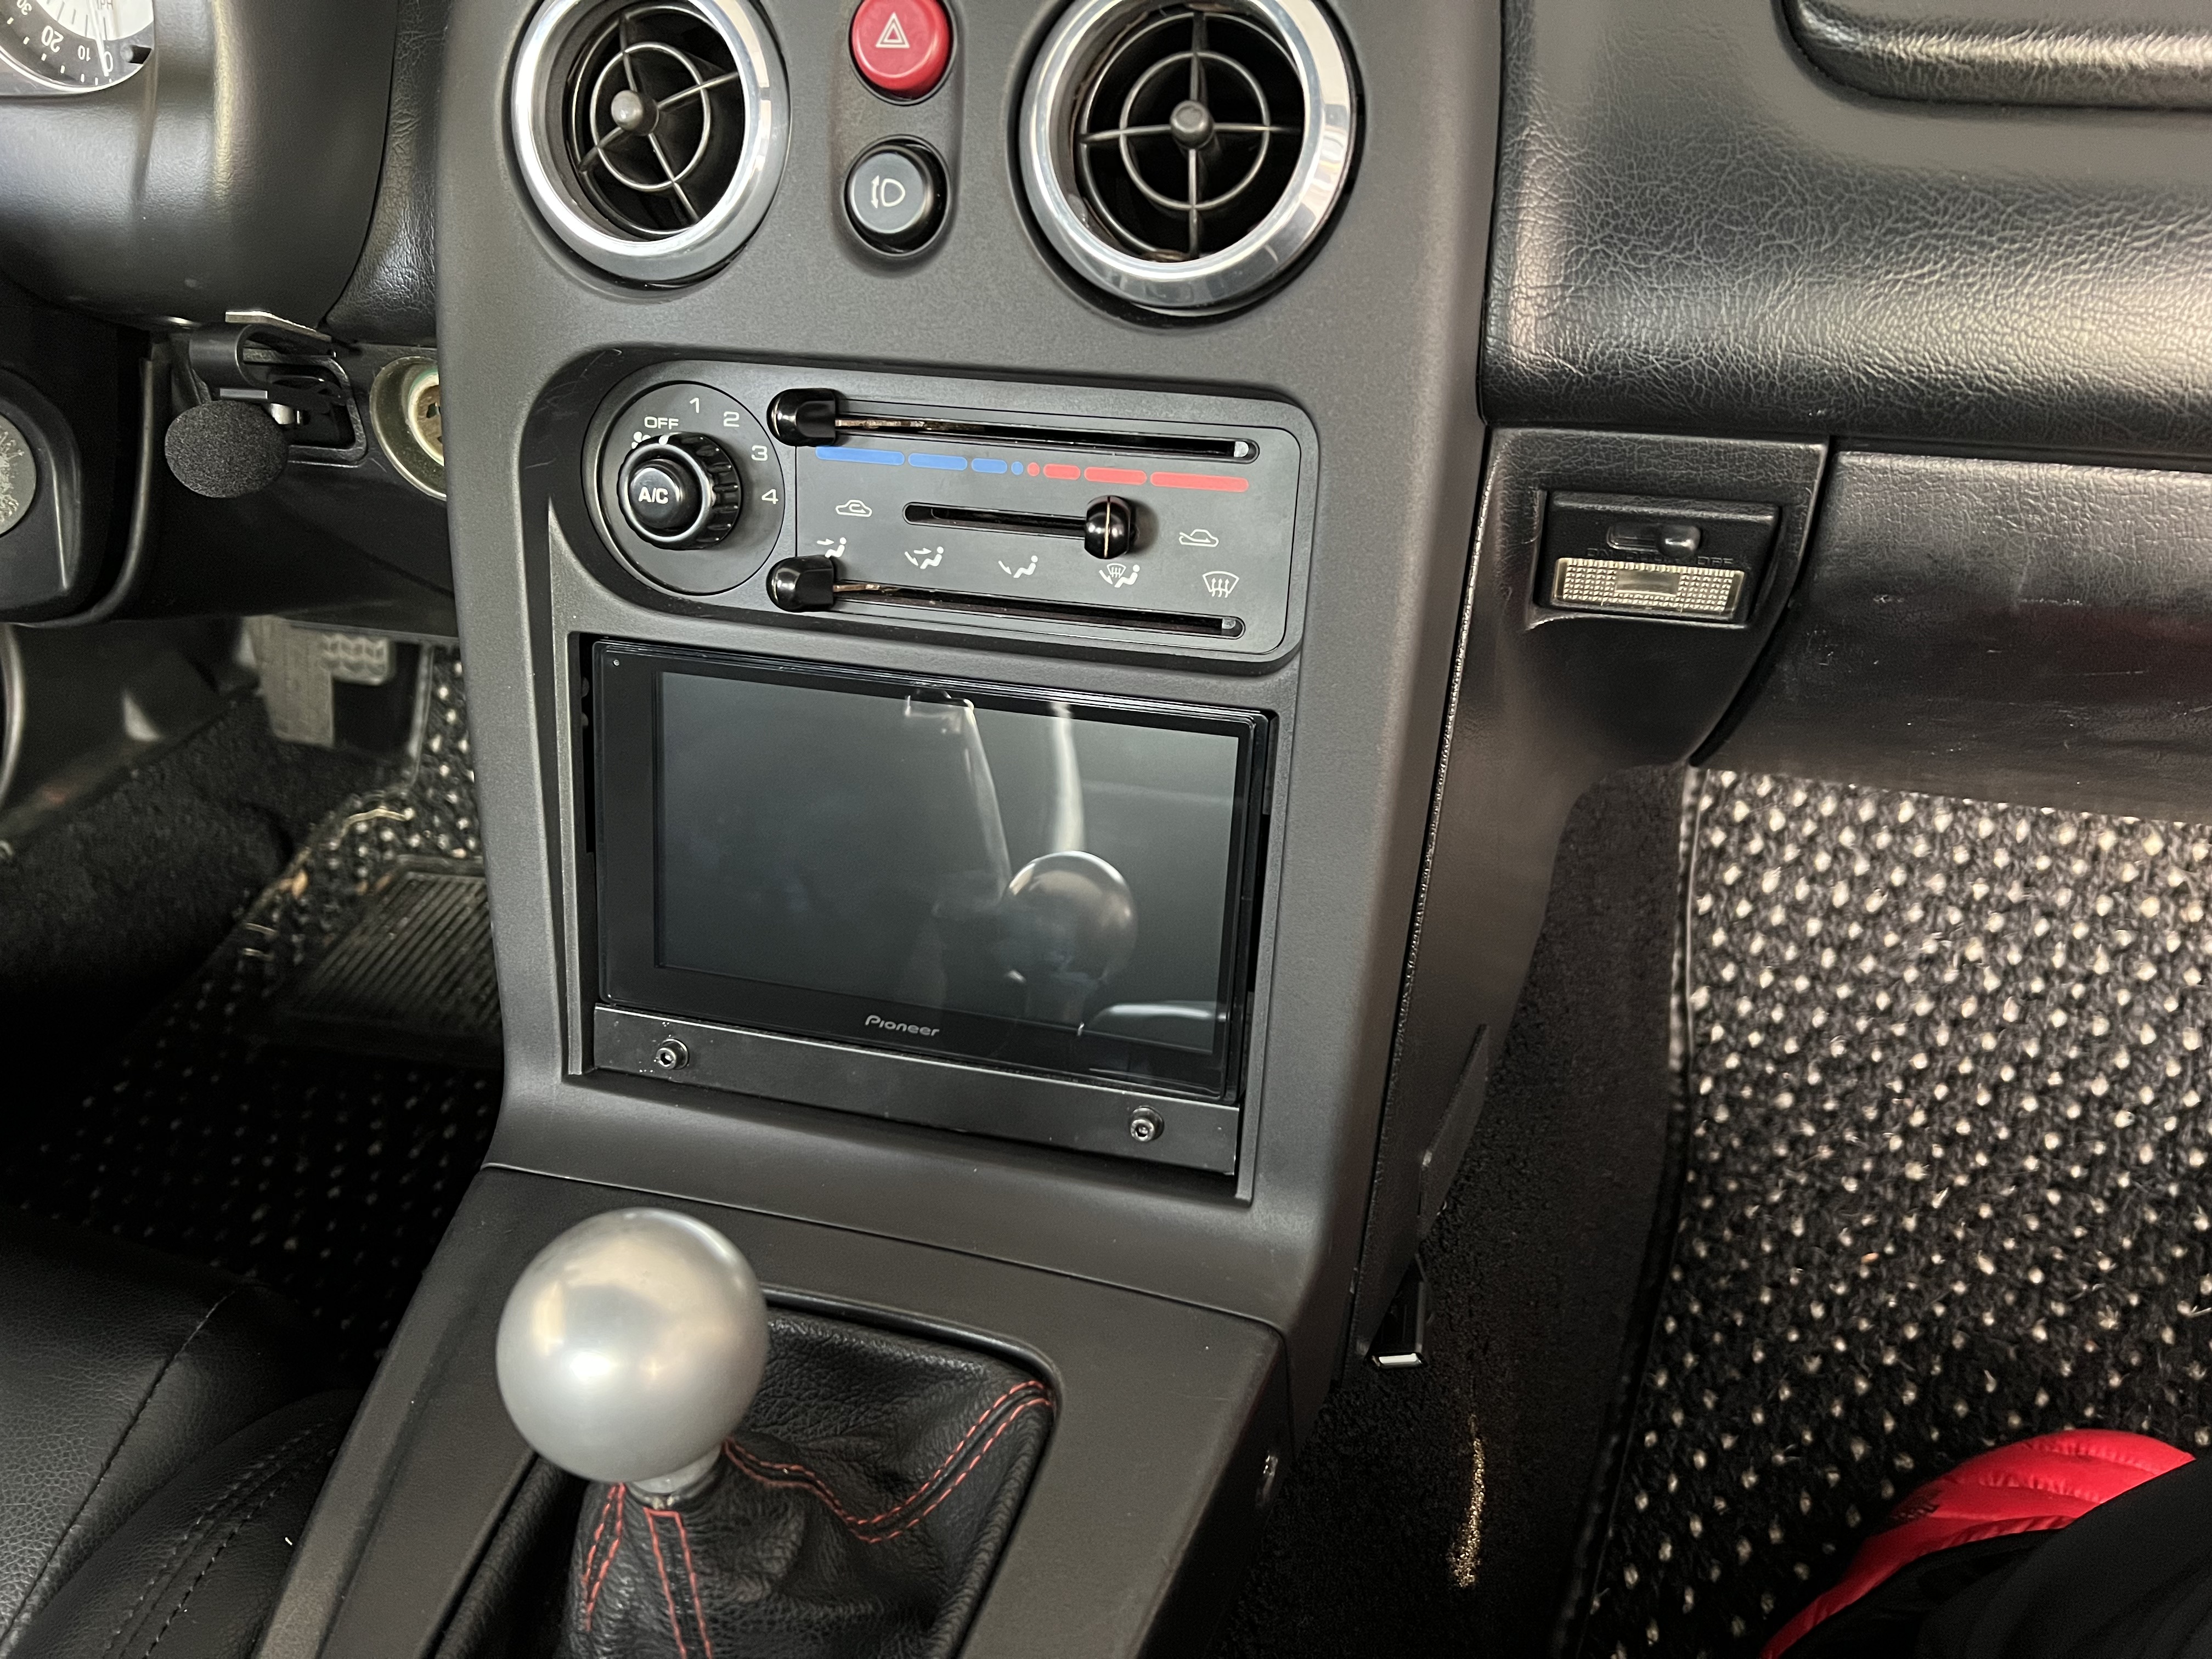
Above, another pretty good view of the three machine screws holding the unit to the factory bracket.


The cap head machine screws with a washer actually look pretty factory. I like it when things don't look too janky. I mean a little janky is ok, but not TOO janky.
Hey, here you can see the Coco mats.

Yeah... it's a little janky.

It's not perfect and I marred the plasti-dip finish a little when installing it, but it's perfectly acceptable.
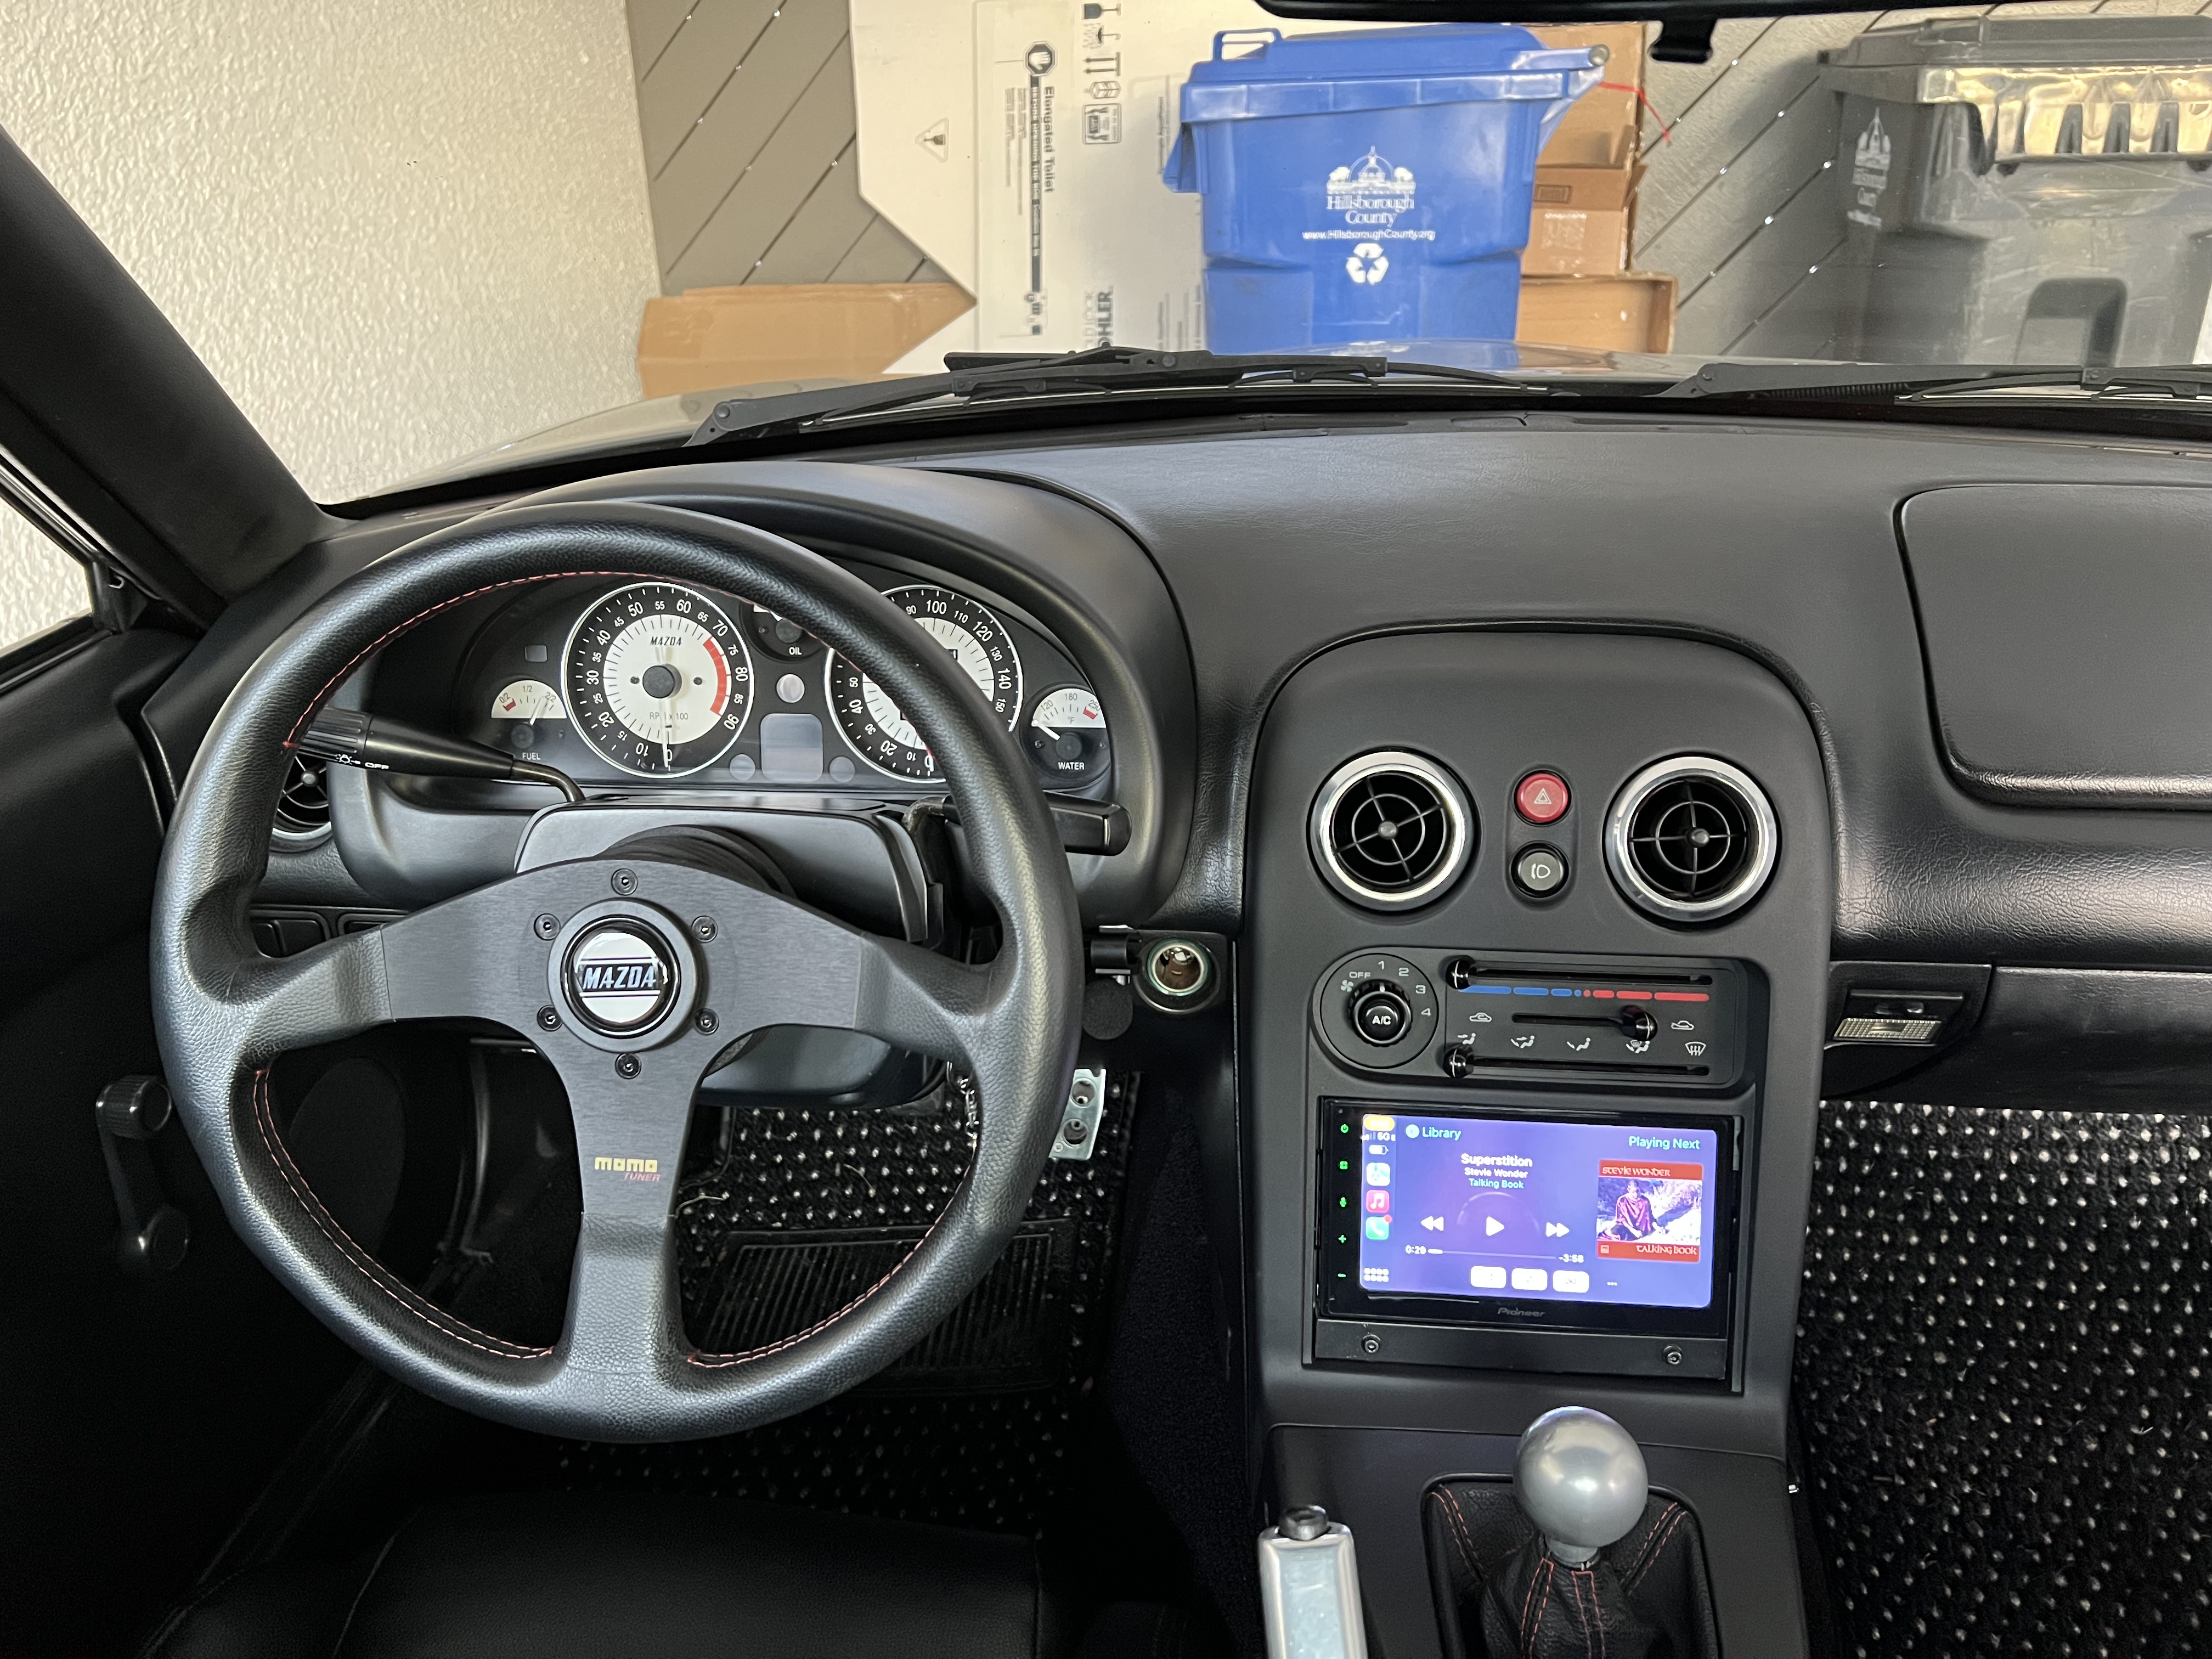
It pretty much looks like it belongs there, so I'm happy.
Once this was in, I thought it sometimes sounded fine, and other times sounded pretty bad, so I opted to replace the 25 year old Pioneer door speakers with some slightly larger (6.5 inch) Kenwood speakers. It improved the sound a bit, but it's still pretty sad. I've found that when streaming audio from Apple Music to this unit, sometimes it sounds really crappy! If I'm playing songs stored directly on my phone it's quite a bit better. So I'm not sure why but it seems like sometimes the streaming quality drops. My phone is a current model iPhone so maybe it's the wireless CarPlay connection. I'll try it wired and see if it makes a difference, but in any case, I think this stereo would benefit greatly from an amp and maybe a small sub. It's not a big priority for me since I don't really need to listen to music in this car, but maybe the next time I'm bored and need something to do I'll address it.
Just a few photos I took yesterday from a drive out in the mountains. With everything we've had going on all spring this was the first time I've gotten this car out for a real drive since I finished the suspension work and got the new wheels and tires, which was already most of a year ago. It sat in storage for six months. I know that's a crime, and I won't let it happen again. The car felt great! The new Flyin' Miata VMAXX suspension works perfectly on these mountain roads, and the Conti tires on the Enkei RPF-1 wheels give prodigious grip.
I did have to sort of get used to this car again. Most of my driving in the last 18 months has been in our 2019 CX-5 Signature, which, while an SUV, has a TON more horsepower and torque than the Miata, and in a real testament to where Mazda is today, refinement you'd expect in a Porsche or Mercedes. When I wasn't driving the CX-5 I was driving my Cayman, which is also incredibly faster than the Miata, and bolted together like a German tank. So, at first the Miata felt slow. And loud. And unrefined. And, well... kinda dopey. Once I hit those mountain roads, though, and retrained myself to keep the engine in the power band, and the car got a few miles under its belt, it started to come alive and open up to me. I started to feel that magic again. I haven't felt it in this car in several years, but the work I put into it last year has really paid off. The magic is still there. Those old familiar sensations were still there. This car has been a part of me for almost 25 years.
On this particular drive the odometer flipped over 180,000 miles. It had been in the 179,000 range for at least the last four years! Here's to putting some more miles on this chassis, now that I have some time and inclination again. Please enjoy the photos.


I've yet to drive more than a few miles on these new ties, but they're the same tires I use on my Cayman S, and I like them.
So, for all intents and purposes, this project of restoring this Miata is complete. There's really not much else that it needs, and I've certainly spent far too much money relative to the car's actual worth. My goal now is to actually drive it, and of course I want to drive the Cayman, too! It's tough when you don't have to go anywhere for work, to put miles on cars.

Since the late '90s I've had a set of Cibie H4 headlights on the Miata. If you're familiar with Cibies you'll know they are European-spec "E-code" headlights and as such have a superior light pattern to the ordinary US DOT spec sealed beam lights early Miatas were saddled with. I had them loaded with Halogen H4 bulbs and they performed admirably for many years. Now that we have other cars with modern lighting technology, though, the old H4s were starting to lose their charm with their yellow light which doesn't seem very bright anymore. So I decided to update my car with some LED headlamps with the hope of getting a brighter, whiter light that hopefully would also look cool and fit with the character of the car. Our CX-5 has LED projector lights that swivel to turn toward the direction the steering wheel is turned, and the Cayman has Xenon HID projectors, and both are excellent. So the lights I chose for the Miata are up against world-class competition.
There are a dizzying array of aftermarket 7-inch LED light units on the market, mostly aimed at the Jeep and cruiser motorcycle crowd, but they fit NA Miatas too. I wanted to avoid no-name Chinese units but also didn't want to spend too much money. As it turns out, I probably spent too much money. I found some lights made by a company called Grote. They looked good and upon investigation I found that Grote is a real lighting company and not just a brand created to sell knock-off items on Amazon. Here's where I screwed up (although it was not entirely my fault). The Amazon listing for the lights said "headlights" and I assumed that meant for $150 I'd receive a PAIR. Not so. I received a single lamp. Reading the reviews and comments I should have picked up on that, but I didn't. I bit the bullet and spent ANOTHER $150 to order an additional lamp, and then left a review on Amazon to alert others to the fact that "headlights" does not indicate that you'll receive plural lamps. Almost immediately after I posted my review, the listing was corrected to say "headlight" - singular. So, you're welcome.
To be honest; the jury is still out on these lights. I hardly ever drive anywhere myself because I work at home, and if my wife is with me we usually take her CX-5, so I have very little night-time driving time behind these lamps. Compared to the Cibie's the light pattern is not as precise. There is a sharp cutoff at the top, but there is a weird bright spot in the middle of the beam which I don't like. It also lacks the characteristic E-code "kick up" to the right which is useful for illuminating road side signs and such.
 The lights are very pretty to look at. They have a classic look and don't look ridiculous like most of the LEDs on the market for Jeeps.
 Here's the light pattern from a single lamp. Pretty good but not great. There's no kick-up to the right like an E-code has.
 Here's the pattern from one Cibie lamp. SO YELLOW but the pattern is actually really good; although it does have a bit of a hot-spot too.
 Side by side, Grote and Cibie. Ignore the aim as I had just had the car in pieces and didn't re-aim the lights yet.
 Here both Grote lamps are installed and these are the high beams.
  Low beams. I'm not enamoured with the hot spots in the center of each beam but I will have to get out for a longer drive at night to really make an informed judgement.
 The question I now have in my mind is whether there's an LED H4 bulb that would perform admirably in the Cibie housings. I've seen a couple threads on the Miataforum where people have had decent results, but no long-term reviews. If the LED H4 is designed carefully I think it could give the correct light pattern in the Cibie housing, however just throwing any LED that fits without regard to the reflector design is unlikely to work well. Some LED bulbs have big heat-sinks on the back, too, which may interfere with the Miata's pop-up headlamp design. I'll update this post when I know more.
 Here you can see just how bad the tie rod ends were with almost 180,000 miles on them. Top is old, bottom is new. I sourced new ones from supermiata.com. The lower ball joints were just as bad. I bought new Proforged ones ones from Rockauto.com. Sorry I didn't get a good photo of those.
 Here are the front VMaxx units. Very nicely built and Flyin Miata supplies the needed parts to convert the NA to the better NB style top mounts. These don't come assembled so there is a little extra work to put these together and torque the top mount bolts down, which can be a bit tricky but is not too bad.
  Here's a rear assembly alongside the old Tein unit that was on the car. These were installed in 2004, so they were getting pretty long in the tooth. You can see the Tein uses a much shorter spring and has the old NA top mount. I do think the VMaxx design with the NB mounts is much better. I think the VMaxx would be fine without the tender spring, but there it is and maybe it has some small benefit.
 Here's a front unit installed and you can see that while I was in there I decided to replace the brake rotors and freshen up the calipers with a coat of paint. I used some caliper paint from POR-15. The rotors are from Centric and have the center hat already painted black. I did this at all four corners and also took the opportunity to lube all the caliper slider pins. I put the same pads back in as they had plenty of meat left. I wish they weren't green.
 Just to show where the ride height ended up. The FM instructions say to start with the fronts at 9 inches from the lower mount bushing centerline to the bottom of the spring perch, and 5 inches in the rear. That put me pretty close to stock height, and not as low as I wanted to be, so I moved the spring perches down about .75 inches and it's pretty good. I could go a lot lower but don't want to.
Driving impressions: I've put a few dozen miles on the car since this was done and I'm very happy with it. The ride on the VMaxx Classics is supple and just firm enough to know it's a sports car. Sawing at the wheel doesn't upset it at all and with the new ball joints there is a lot less clonking going on. Bumps don't upset the car nearly as much. The brakes feel better and the car just feels finished. For the first time in 3 years, this feels like a car I can put my wife in and we can go somewhere without feeling self-conscious.
 Just a quick update from the 2006 Cayman S. It just passed 50k miles last week. I meant to take a photo at the time it happened but was busy driving and missed it. I hardly ever drive anymore, sadly, so the last 500 miles or so took more than a year! I really need to get out more. Even though I have nowhere to go and two cars to go there with (three if you count the family CX-5 which we use for most everything), I'm still doing some maintenance and updates this year. More to come.
 Here you can also see the shiny, brand-new factory Mazda tail lights I bought from Priority Mazda.


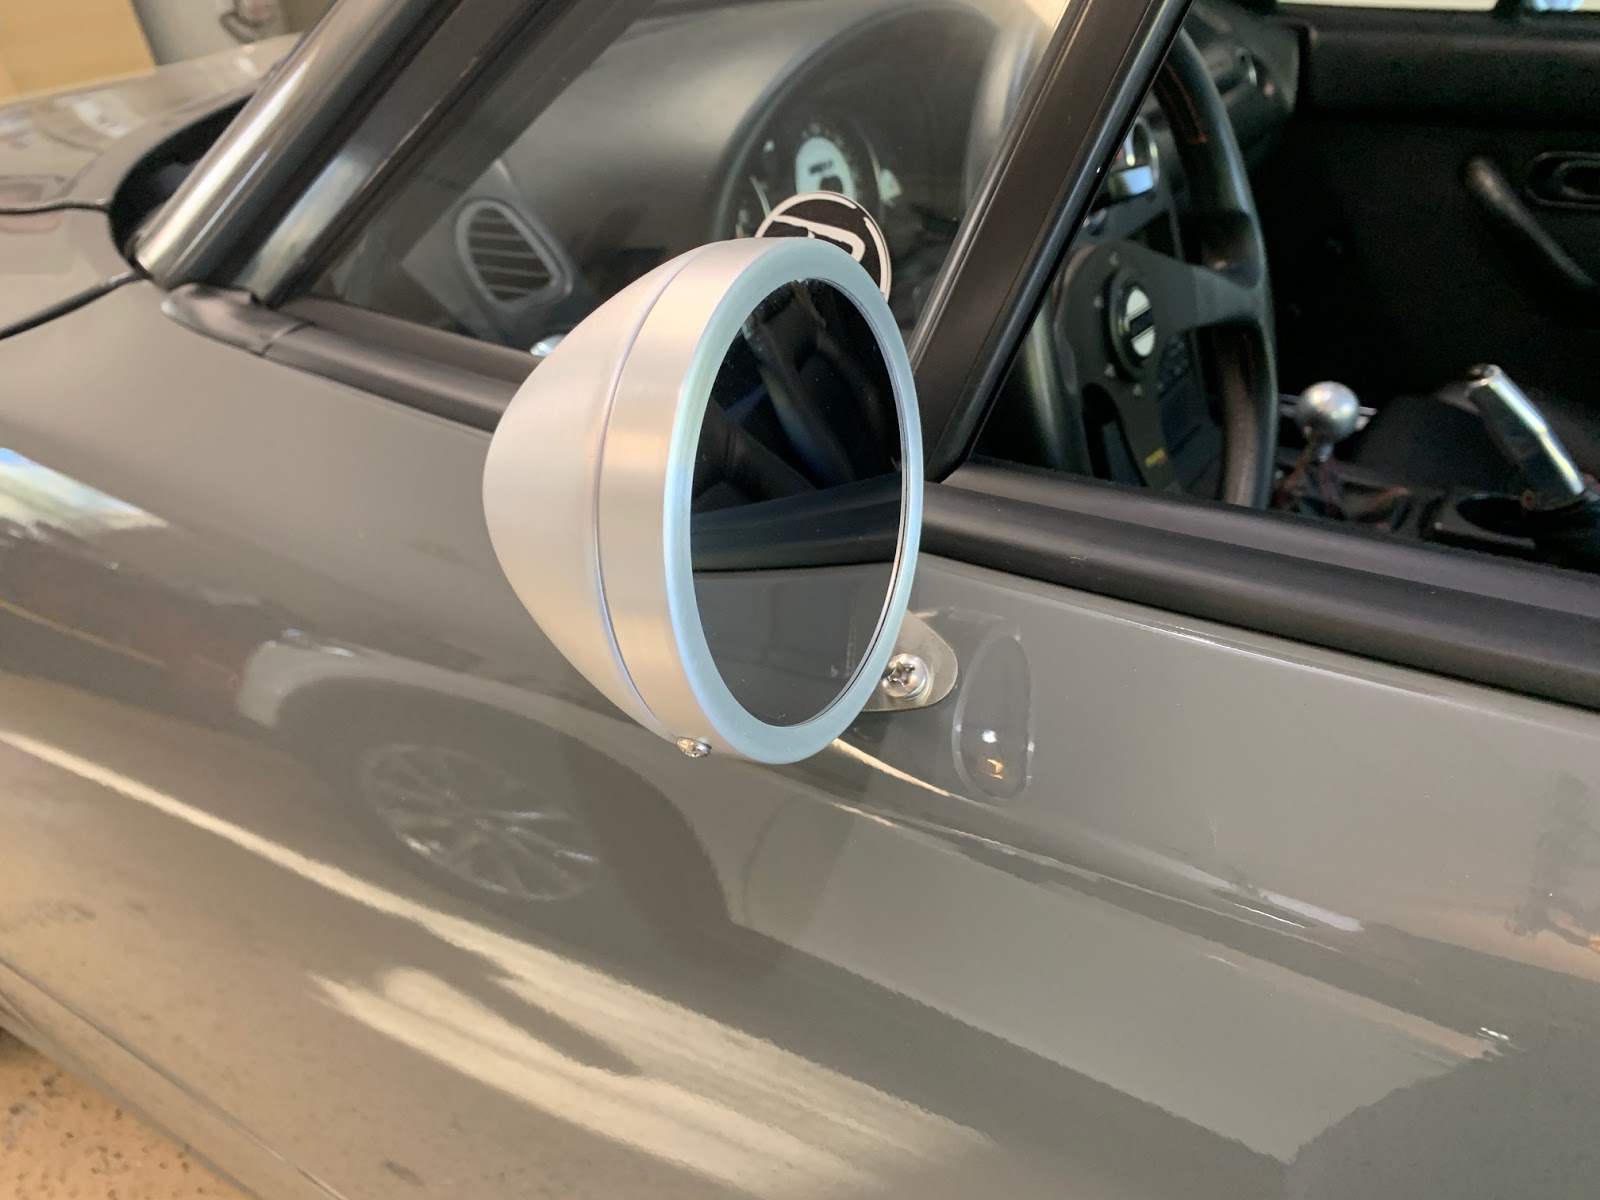
Even though I had the original mirrors painted with the rest of the car, and they came out looking great, I still wanted to try something different. I got a set of Raydot racing-style mirrors from Moss Motors and the result is quite nice! They look great and have a bigger impact on the look of the car than I expected. The pictures here really don't do them justice. Installation was very straightforward but takes a little trial and error to get the tension on the mount right. Too loose and the mirrors will flop around - too tight and you can't adjust it. You get two identical mirrors which means BOTH are convex, so that takes a little getting used to. But the convexity makes up for the smaller size of the mirror, so it's worth it. They're also a few ounces lighter than the factory mirrors, if that floats your boat.